Mining
How to Install Hive OS to a M.2 SATA or mSATA drive

In today’s post, I’m migrating one of the remaining Windows machines over to Hive OS.
I’ve long decided that the hassle of trying to run a Windows machine at any meaningful scale while mining is a silly waste of time and as I’m discovering, hashrate stability, energy, and stress!
With Hive OS I love to be able to control my mining rigs remotely. The flight sheet and overclocking template feature is so powerful you can switch the currency you’re mining in seconds. Provided you’ve set it all up, it’s there for when you need it, without any messy .bat file and “run as administrator” right mouse button clicks.
So today I’m going to talk about how quick and easy it is to flash an SSD / M.2 SATA / mSATA drive and get a Hive OS worker running with minimal effort.
Updated September 2026: the flashing steps below still work. The Hive OS image, the flashing tools and the way a worker connects have moved on a little, and the table below covers each. The bigger change is outside the software: Ethereum moved to proof of stake in September 2022, which ended GPU mining of ETH.
What’s changed since 2022
| 2022 (this guide) | Now | |
|---|---|---|
| Hive OS image | A versioned file from download.hiveos.farm | download.hiveos.farm/latest always fetches the current stable image |
| Writing the image | Balena Etcher | Etcher is still Hiveon’s recommended tool; Rufus is the listed alternative |
| Connecting the worker | rig.conf copied onto the drive | rig.conf still works, and can hold the rig ID and password or the farm’s FARM_HASH; the ready file downloads from the rig’s settings |
| GPU mining | Ethereum | Ethereum moved to proof of stake in September 2022. Is GPU mining worth it in 2026? |
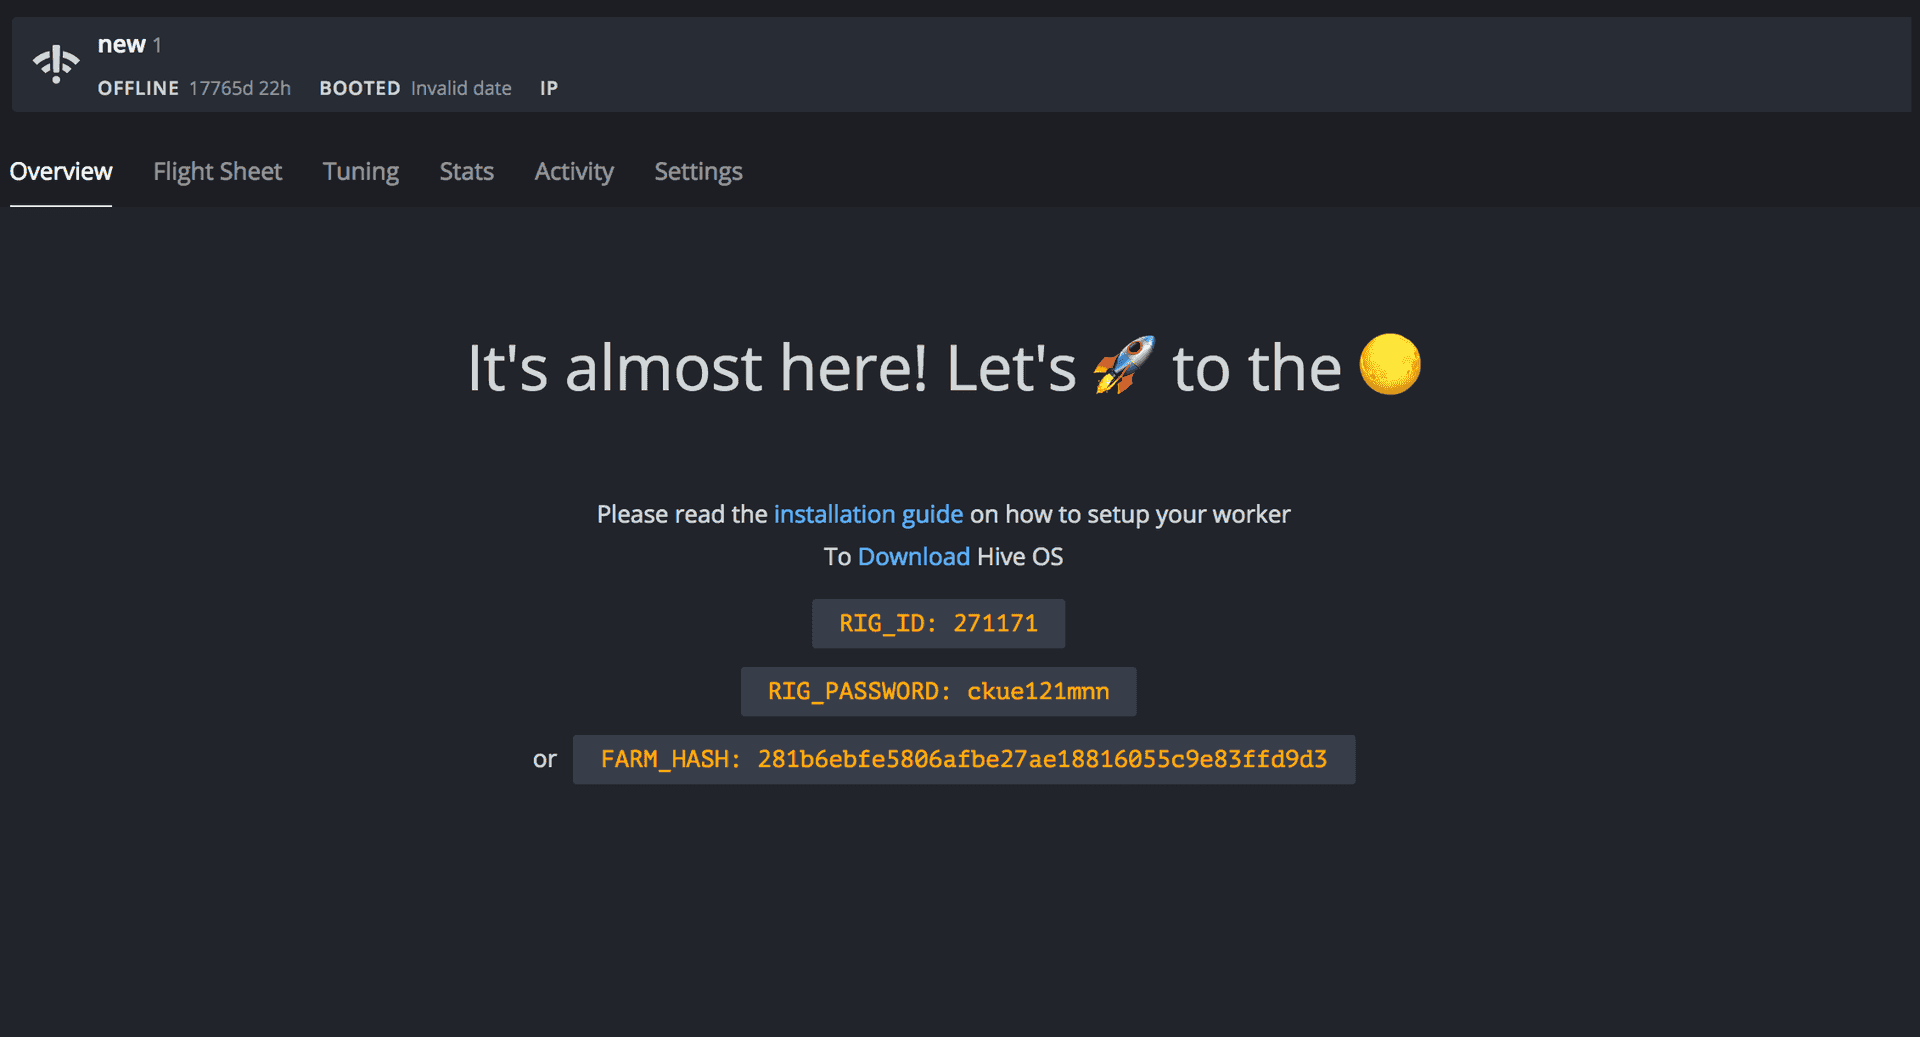 The Hive OS worker screen today. Image: Hiveon
If you’re planning on adding a new worker to your farm using this method, you’ll need the ability to flash an SSD / M.2 SSD or an mSATA SSD. All you need is the correct adapter – Octominers use a standard SATA SSD, the ONDA motherboards in the Minebox8L’s use mSATA drives and the ASRock H510 boards I used for the water-cooled rigs require M.2 SATA SSDs:
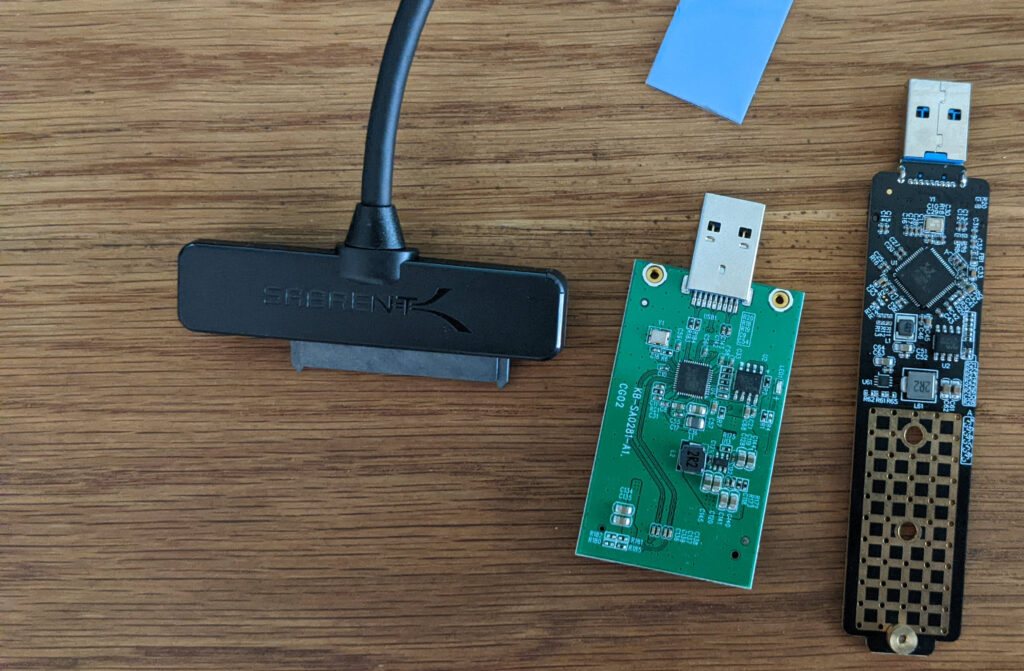 A collection of SATA to USB adapters: Sabrent SSD to USB, mSATA to USB adapter, and M.2 SATA SSD to USB adapter (left to right)
The process to migrate a machine to Hive OS by flashing the SSD looks like this:
Table of contents
- Add a Worker to your Hive OS Account
- Flash an SSD drive with Hive OS
- Set up your new worker
- I’m new to Hive OS, what do I need to know that you haven’t covered here?
- Getting the miner started
Adding a Worker to Hive OS
This procedure should look more or less the same whether you’re a new Hive OS user (sign up here) or just looking for the easiest way to add a new worker to your existing setup.
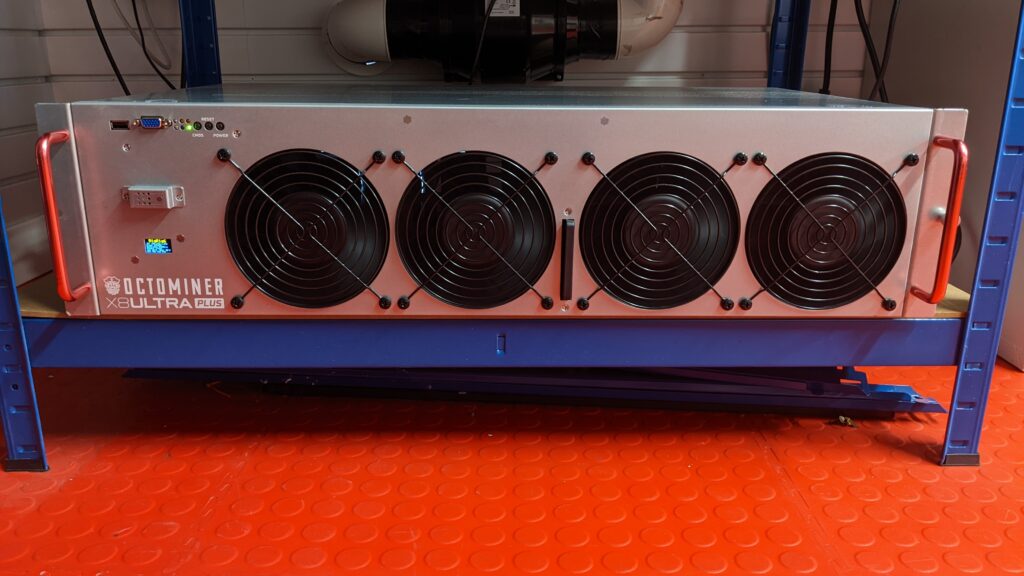 Octominer x8 Ultra Plus running Hive OS (from my Octominer installation guide)
As some machines come pre-configured with Hive OS it’s pretty easy to run a miner on Hive OS without actually having ever installed it.
Pre-requisites
Aside from choosing the correct USB adapter described above, you’ll also need a few things ready on your PC.
Firstly, you’ll need to download the latest stable image, which you can do so here: https://download.hiveos.farm/ – the current stable image at the time of writing is hiveos-0.6-217-stable@220423.img.xz. Download and unzip using 7-Zip. You’ll extract an iso image file that we’ll need later.
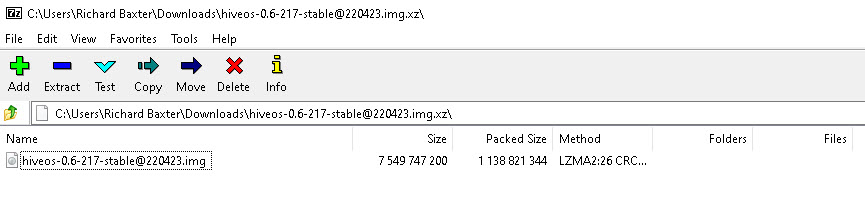 Hive OS iso image ready to unzip
Secondly, you’ll need BalenaEtcher installed to flash your drive.
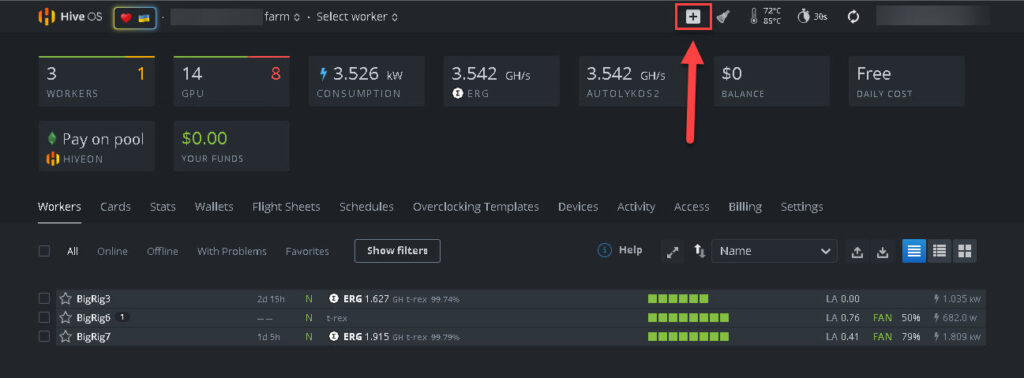
Assuming you’ve opened your account or already have one, begin by clicking the “+” icon in the top navigation:
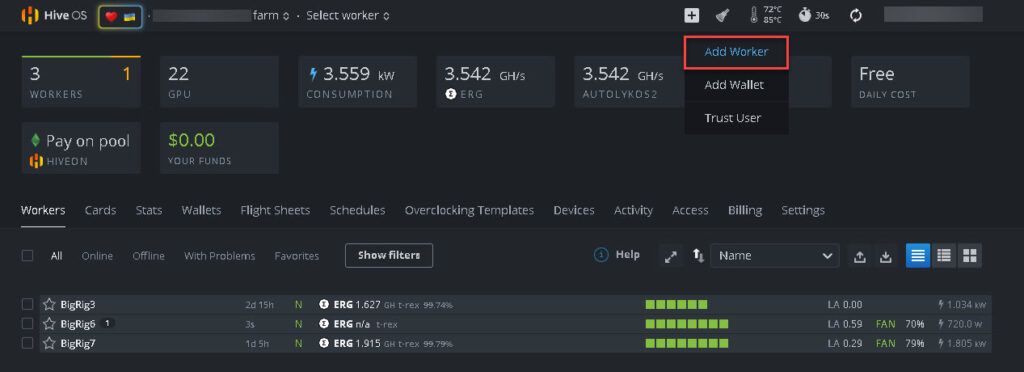
Click “add worker” (highlighted):
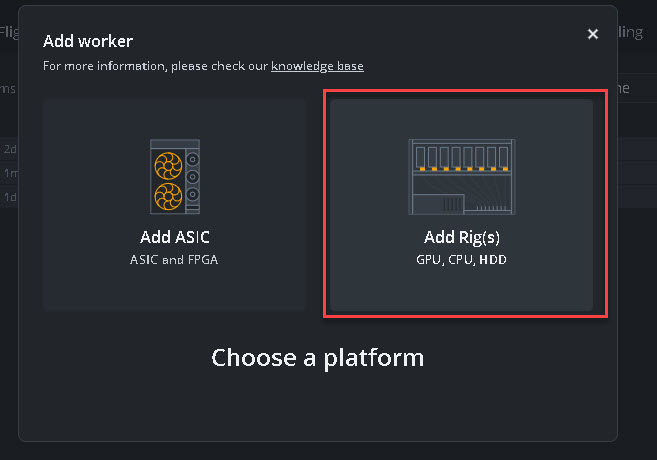
Select “Add Rig(s)”
And then select “Connect existing”:
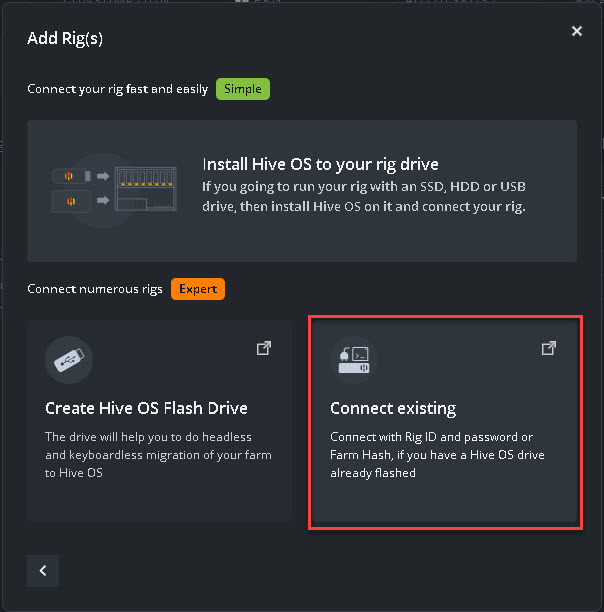
Everything you need to connect the rig to your farm is contained in this downloadable rig.conf file. You’ll copy it to the root of your freshly flashed drive once that’s done, so keep it somewhere you can find it:
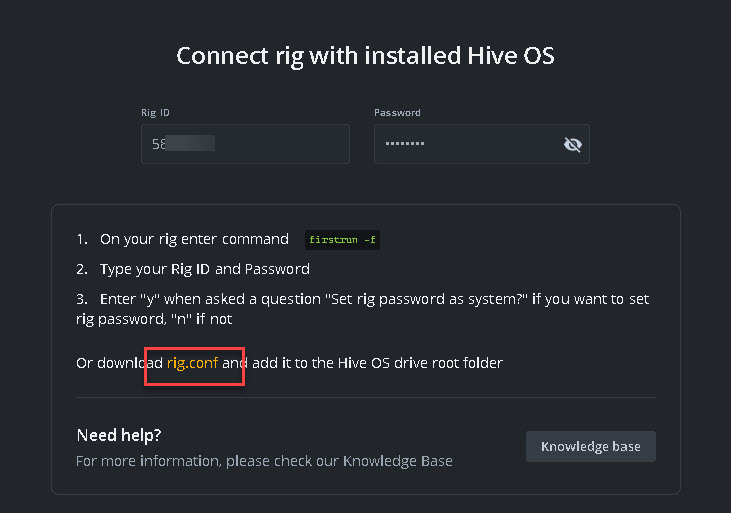 Download this rig.conf file (highlighted)
How to flash a drive with Hive OS
Now Hive OS will be ready for a new rig when it boots and signs in. But, you’ll need to flash a drive first! Remove your drive from your mining rig and fit it into your USB adapter:
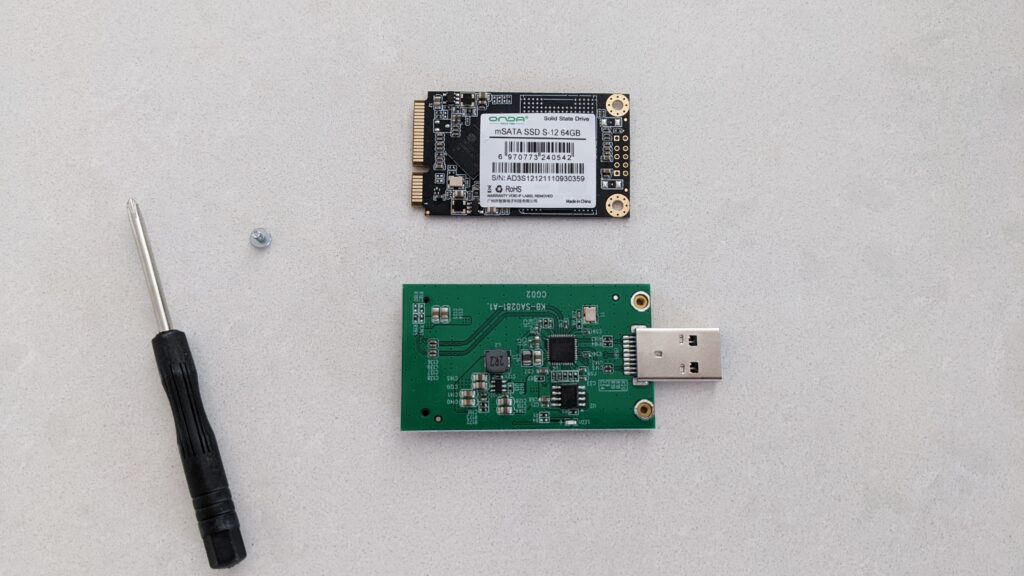 An mSATA SSD with an mSATA to USB adapter
Once you’ve installed the drive into the USB adapter, connect it to your PC. It’ll behave much like a USB stick – you’ll get a new drive assigned in “My PC”. On my adapter there’s a little blue light, to tell you all is well, I think:
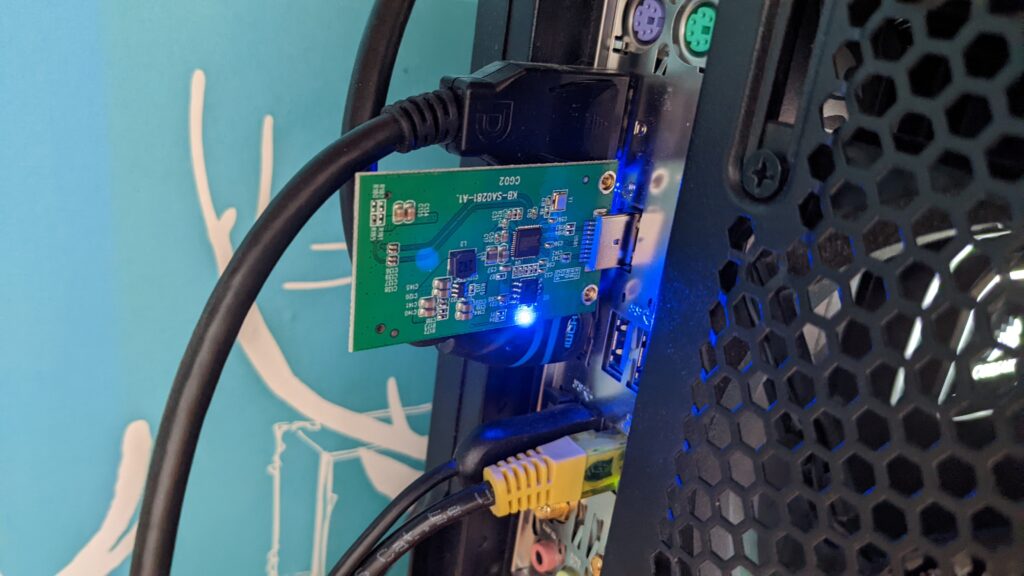 Drive connected and ready to flash
If you want, you can delete the original partition(s) on the target drive with Windows Disk Manager. As I understand it, this is optional as the iso image will overwrite the boot partition anyway.
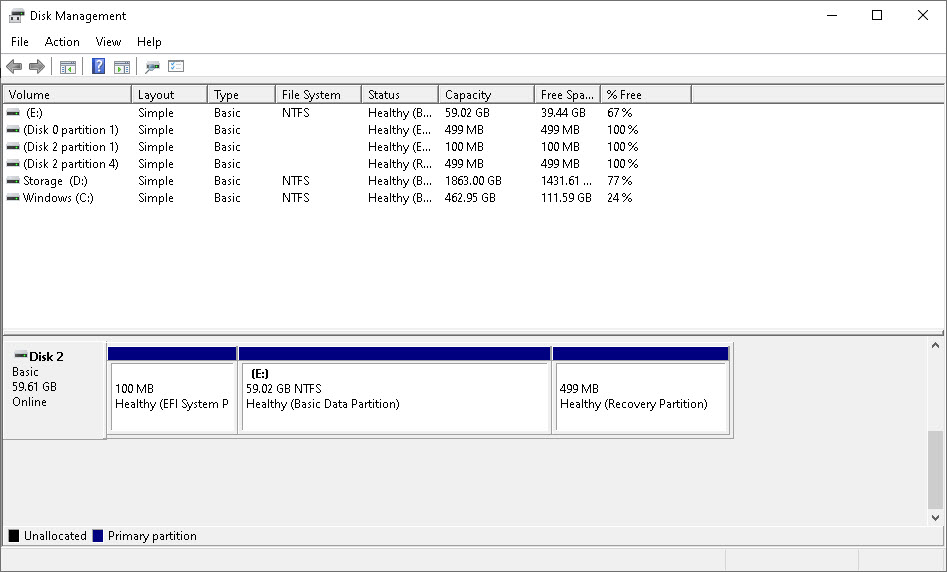 The contents of our target drive to be overwritten – you can delete the main partition if you like
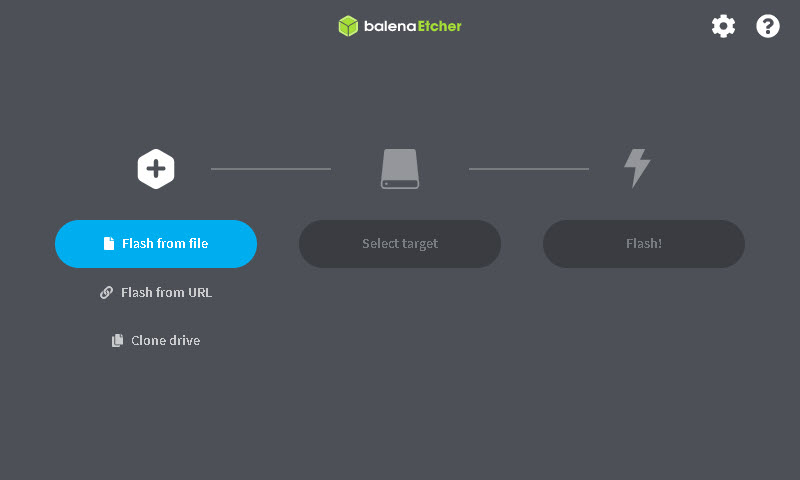
To flash the drive, open BalenaEtcher. Select “Flash from file” and find your Hive OS iso image:
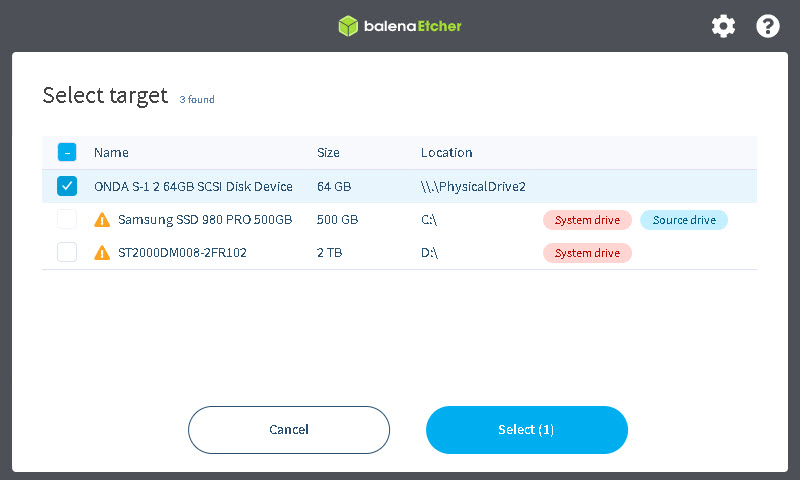
Next, select your target. Balena is smart enough to inform you which of the drives in the list are critical system drives. Knowing the name of the SSD helps too as you can see from the list below. Click the correct checkbox and then click the blue “Select” button:
Then watch as Belena flashes your drive:
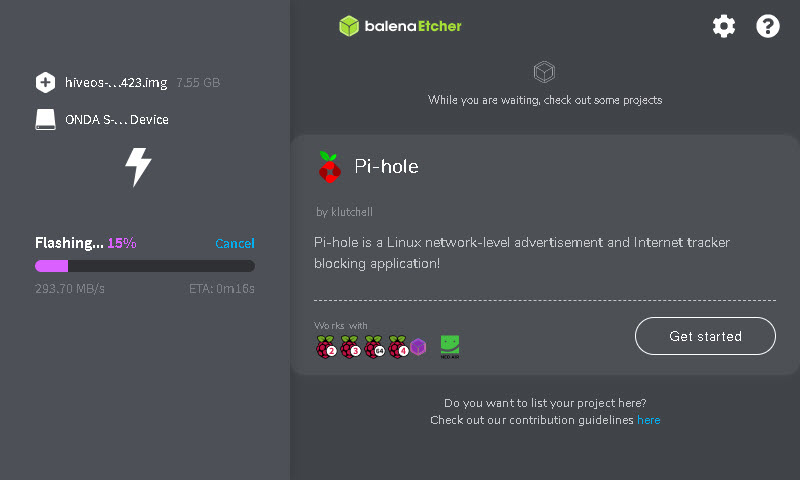 Balena Etcher flashing an SSD
When this process is complete, you’ll get a success confirmation dialogue. Time to close Balena. Your drive will seem like it disappeared – just eject it safely as you would any other USB storage device and re-insert the drive.
This is the root of your new Hive OS drive. Copy the rig.conf file. That’s it – this drive is now ready to go back in the rig!
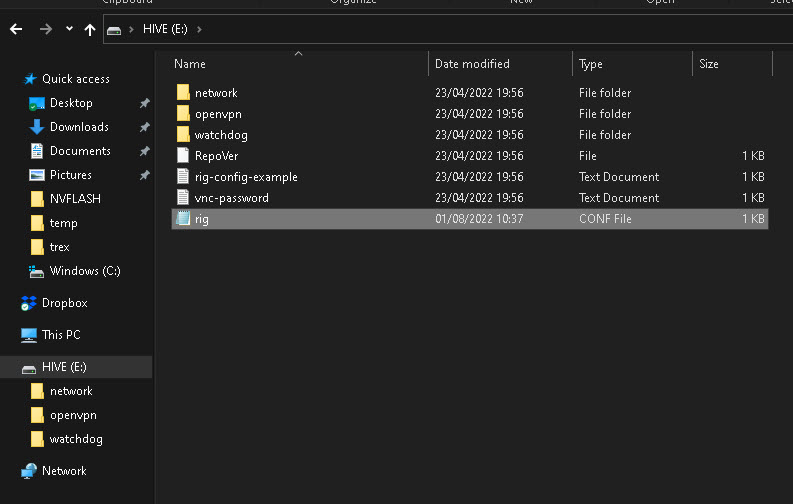 Copied rig.conf file to new Hive OS boot disk
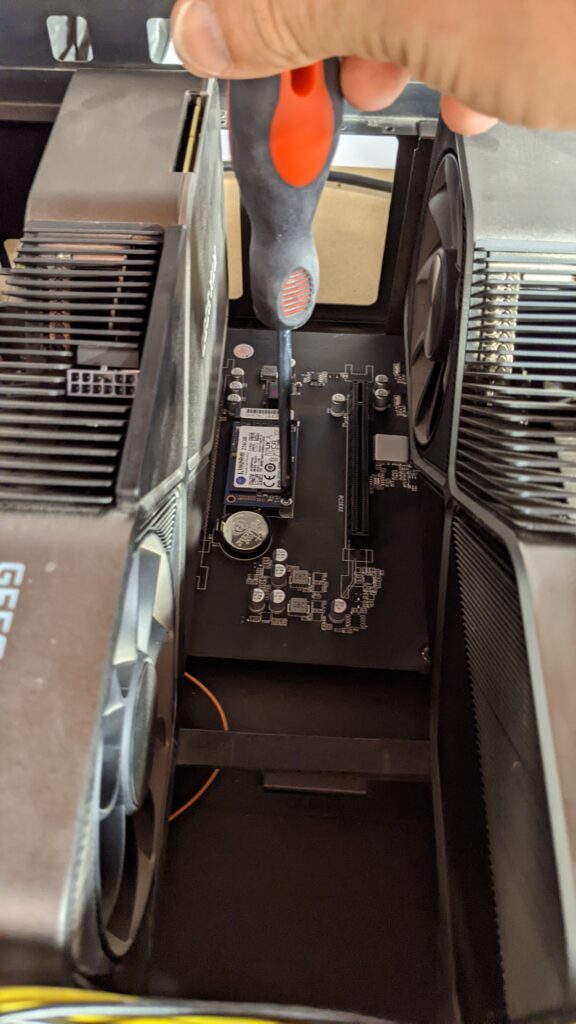 Re-installing the mSATA drive in a Minebox8L – getting a bit dusty, we’ll have a clean down soon.
Return to Hive OS and set up your new worker
Now it’s time to turn our attention back to the farm. After you’ve booted the new Hive OS rig, it has a first boot procedure that takes a small amount of time. So you’ll probably see something like this for a minute or two:

Eventually, it’ll come alive:
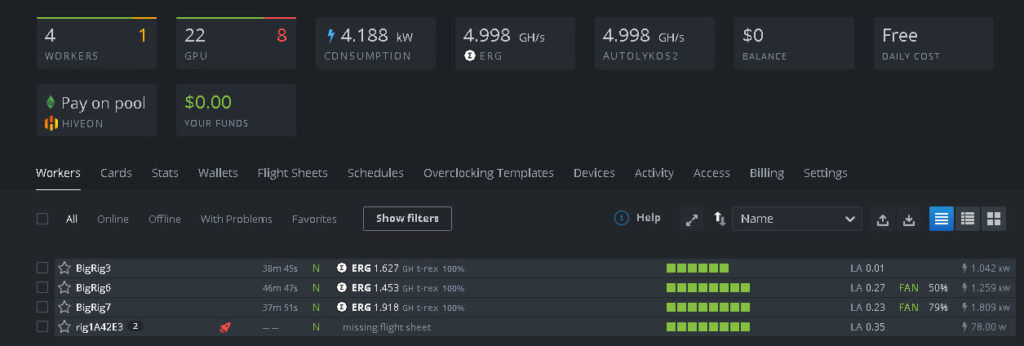 New rig now added to Hive OS ready for Overclocking and Flight Sheet assignment
First, a bit of housekeeping. Click your new rig and you’ll go directly to the rig’s control panel with its list of GPUs, and setup options. You might see there’s a new version ready to download and install, click the orange link and the latest version will be selected for you:
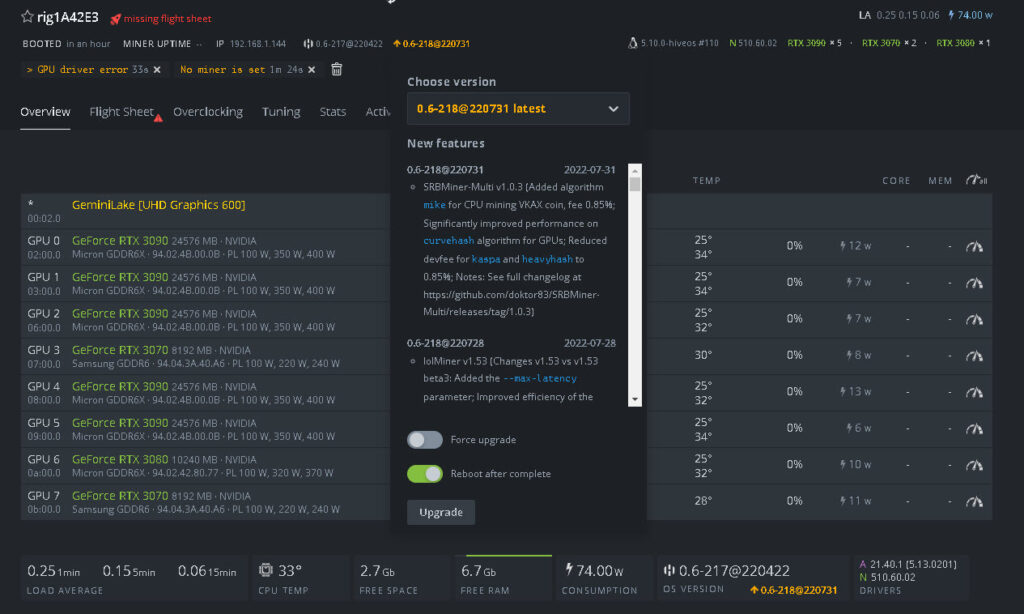 New installation ready for a small Hive OS update
I always reboot the machine after the update and, for what it’s worth, should the rig be mining at upgrade time, I stop the miner before executing the update.
Once that’s done, you can name your rig properly:
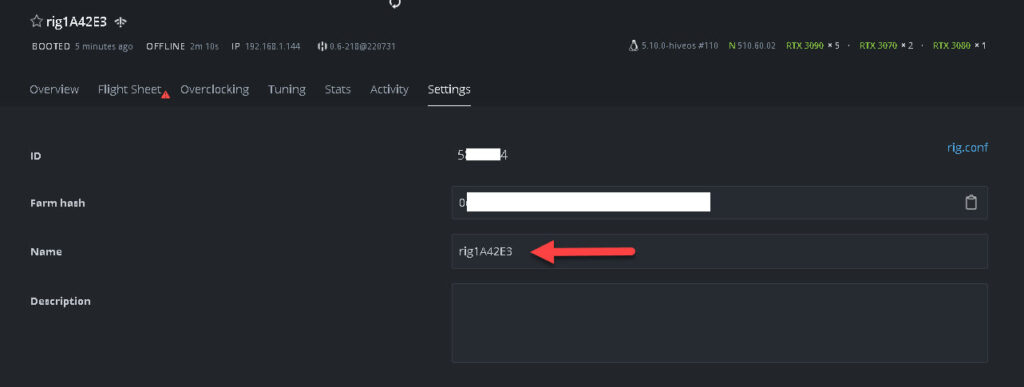 Name your rig in the settings tab (farm hash and ID obfuscated for obvious reasons!)
Next, we’ll set our overclocks. I like to do this before assigning a flight sheet so that the miner doesn’t start with sub-optimal settings.
You have the choice of configuring each GPU separately or, as a group. You’ll notice there’s a “popular presets” tab – this is a good place to start if you’re new to Hive OS. I have the fortune of knowing my overclock settings from other rigs also currently mining ERGO.
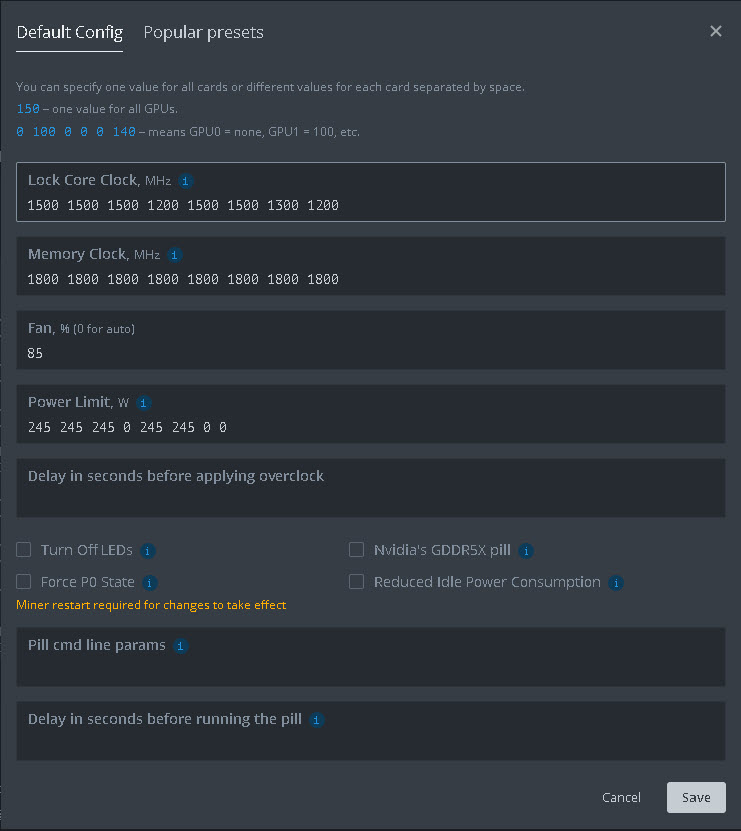 A safe starting point for my OC settings to mine ERGO
The great thing about Hive OS is the granularity you have in making fine adjustments to the OC settings. Here are the finalized OC settings. As I’ve already got an ERGO flight sheet setup in my account, you can start mining very quickly:
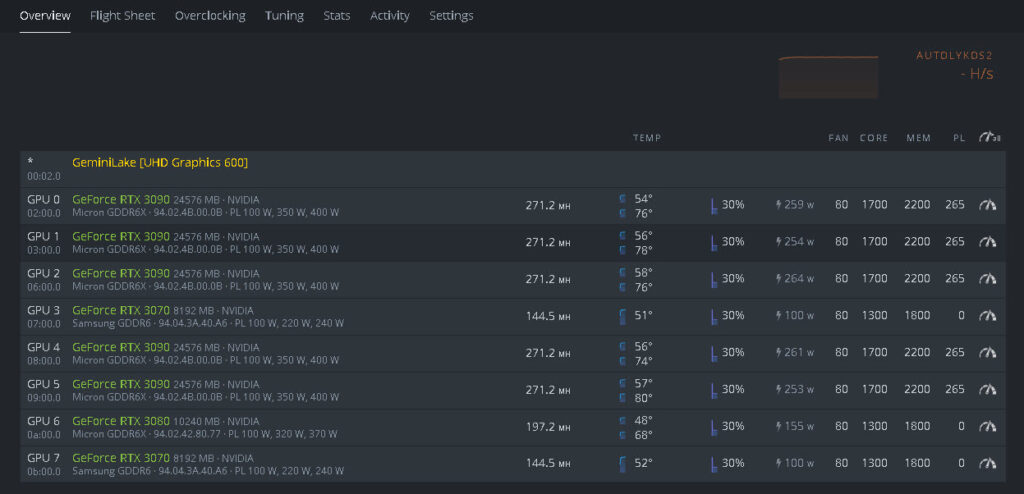
When you’re satisfied with your OC settings, a smart move is to save those settings as a template. I save mine with the machine name and algorithm in the template name:
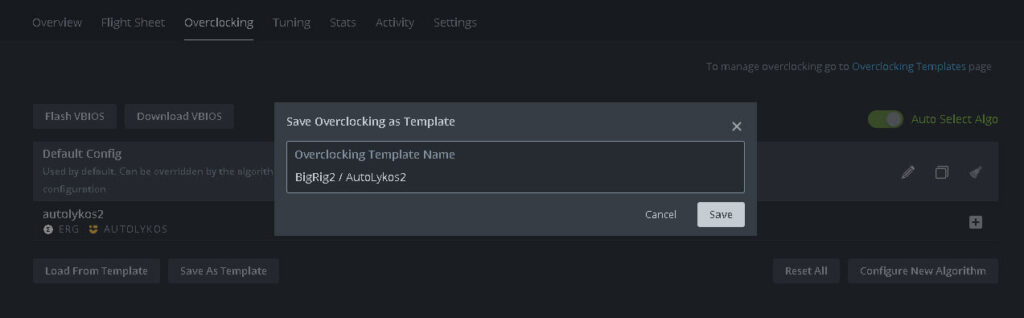 Overclocking template for this rig and algorithm
I’m new to Hive OS, what do I need to know that you haven’t covered here?
Provided you’ve set up an account (which is very easy, register here), the process outlined above has everything except an explainer on how to set up a wallet, and how to add a flight sheet.
Setup a Hive OS wallet
Firstly, let’s set up a wallet. Head to wallets > create wallet from your farm home. Mine looks like this:
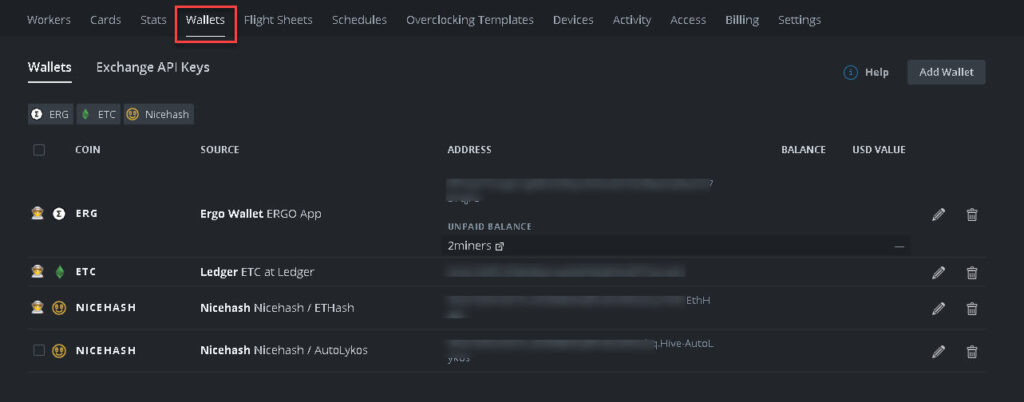 A wallet list in Hive OS
ERGO, ETC, and Nicehash (ETHash and AutoLykos) for when I feel like topping up the BTC balance.
Adding a new wallet is very simple. Click “Add wallet” and you’ll get a dialogue pop-up that looks like this. Select the coin, and add your wallet address.
Note: if you’re planning on mining to Nicehash and you want to see each individual rig by name in the Nicehash UI, add your rig name after your BTC Nicehash wallet address eg [your-address].RigName
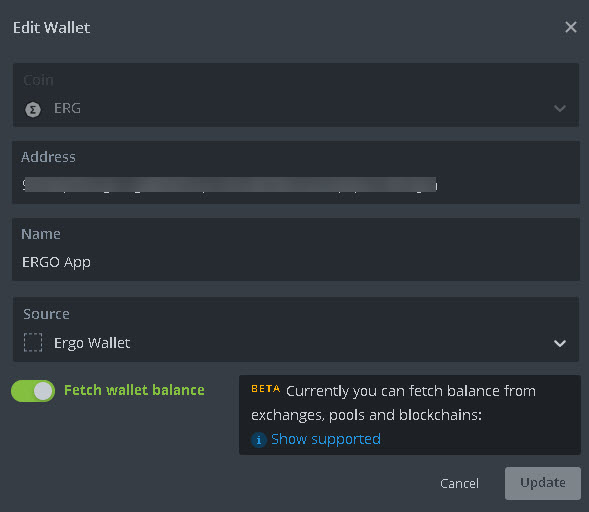
You can give your wallet a name (highly recommended!) and it’s worth making it a global wallet address so all rigs in your farm could mine using that wallet.
Flight sheet
Flight sheets are the “instructions” to start a miner mining to a nominated pool with your preferred mining software. You need a wallet configured to complete the flight sheet creation process.
Here’s an example:
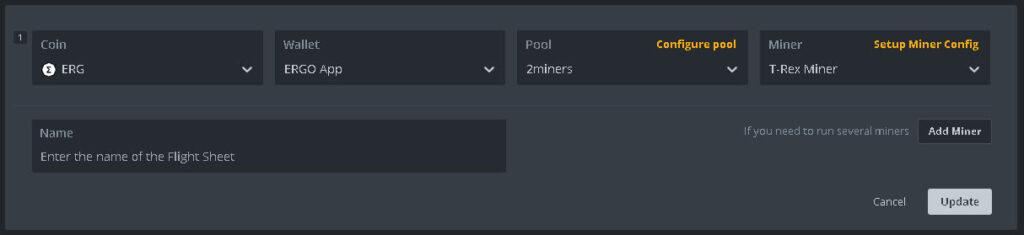 Hive OS flight sheet ready setup
The great thing about flight sheets is that they are global. This means that any machine on your Hive OS farm can run this flight sheet once it’s setup. To do so, create a flight sheet via the flight sheets tab on your farm homepage:
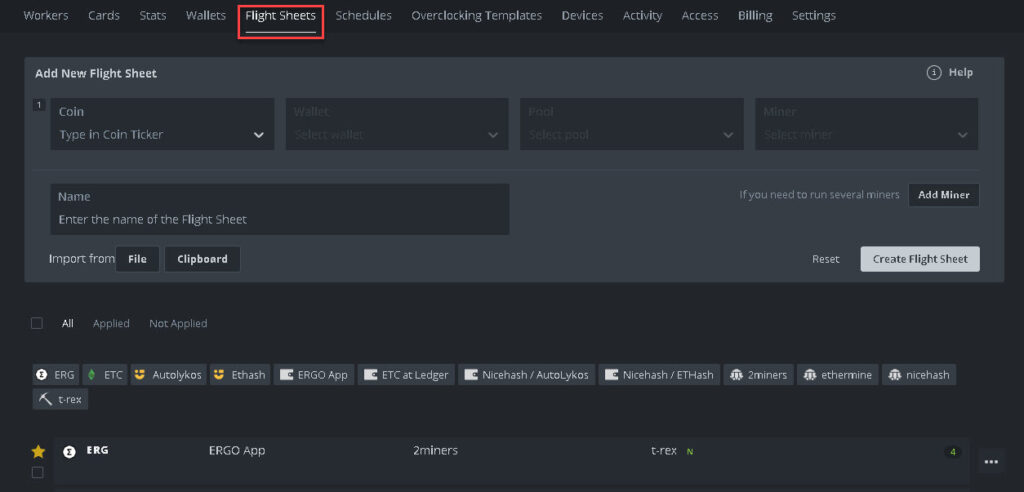 Create a flight sheet via the flight sheets tab on your farm homepage
Firstly, select the coin. There are lots of them in the dropdown!
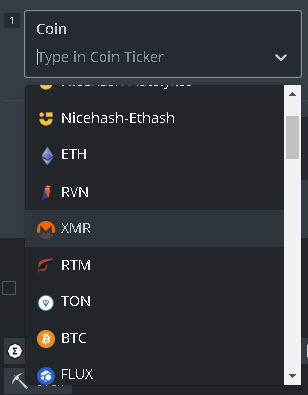 Select your coin in the coin tracker
Next, select a wallet. Hive OS will only show you wallets with addresses compatible with the coin you’ve selected in the flight sheet, for example:
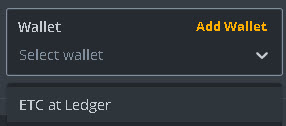
Select a pre-configured wallet or use the orange link to create a new one.
Next, select the pool you’d like to mine to:
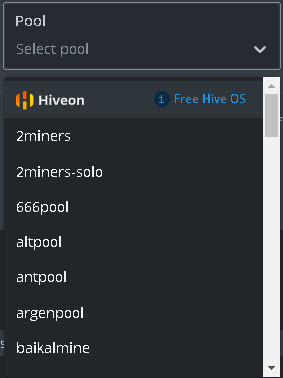
Hive OS will display a popup once you’ve selected your pool – choose the appropriate stratum server from the list it provides:
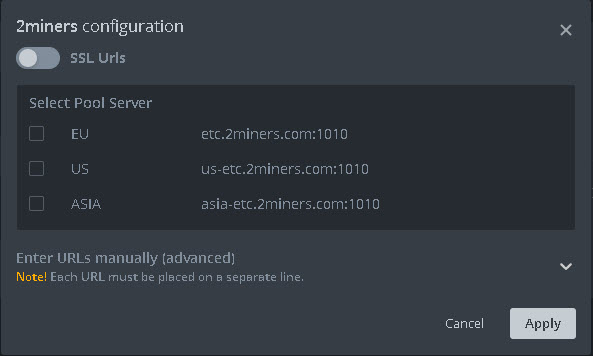 Pool auto-configure – no more looking up stratum addresses and ports!
Selecting a miner is very simple, as they’re all pre-configured and updated with each new Hive OS version.
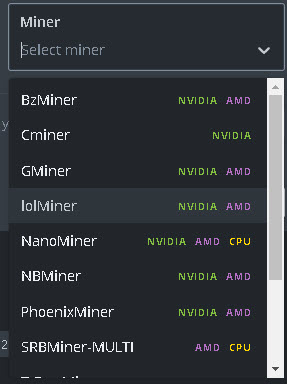 Select your preferred miner from the available list
Finally, give your flight sheet a name, for example, “ETC at 2Miners with LOLminer” and you will always know exactly what that flight sheet is about. Save the new flight sheet.
Getting the miner started
So once you have your OC settings, wallet, and a flight sheet setup, starting the miner is as simple as going back to your new rig, clicking the flight sheets list and clicking the rocket. Off it goes!
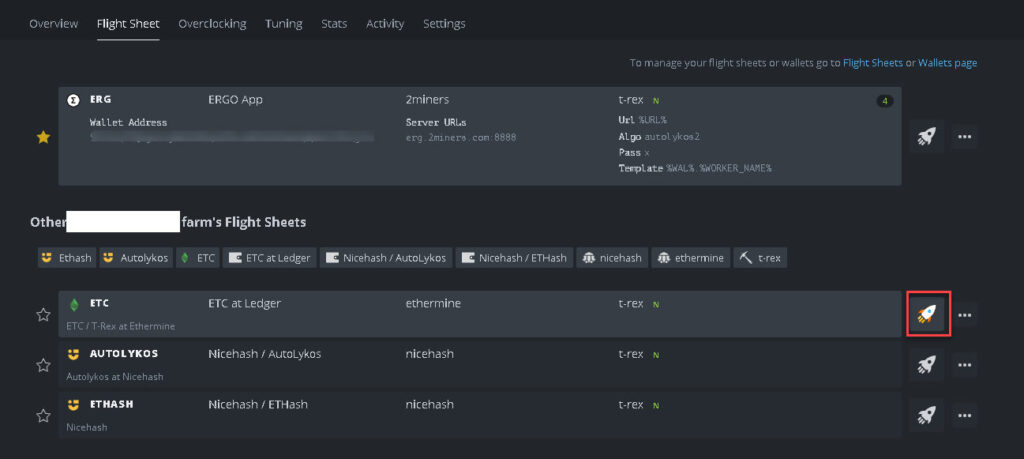
Once I’ve started the flight sheet I return to the rig’s homepage and monitor hashrate, temperatures and make small tuning changes as I go. But that’s it – so much simpler than Windows, and provided everything is working (it’s hard to get Hive OS wrong), it’s so fast and easy to mine. I’m a total Hive OS convert and will be moving another rig over in the next few days. Enjoy!
Keep reading

How to mine and support ERGO
Build a Solo Bitcoin Mining Node with Umbrel and DATUM Gateway
Testing NBminer in Windows and why I’m moving to pool mining
Nicehash Miner Setup: Get Hashing Quickly with our Starter Guide